Authentication - JWT Grant OAuth Flow
Setting up your Docusign Sandbox account to allow you to send test document signing requests from the fmESignature Link file only takes a few minutes – you need to complete the following steps:
- create your free Docusign Sandbox account
- create a new API App and Integration Keys in the Sandbox
- copy/paste the keys into the fmESignature Link (Docusign Edition) Accounts screen
We have a short video demonstrating the setup of the Docusign Sandbox and creating a new API integration – check out the videos page to view this video (YouTube link). The Docusign eSignature REST API 101 guide also has details on creating your first API integration.
Once you’ve created your free Developer Sandbox Account you need to first create the Integration Key that you will use with the fmESignature Link file. We recommend having the fmESignature Link file open at the same time on the ACCOUNTS screen so you can copy/paste keys from your Sandbox account directly to FileMaker. We create a blank record in the Accounts table for you to use named 'DocuSign Testing Account'. You can also create a new record in the Accounts table if you prefer.
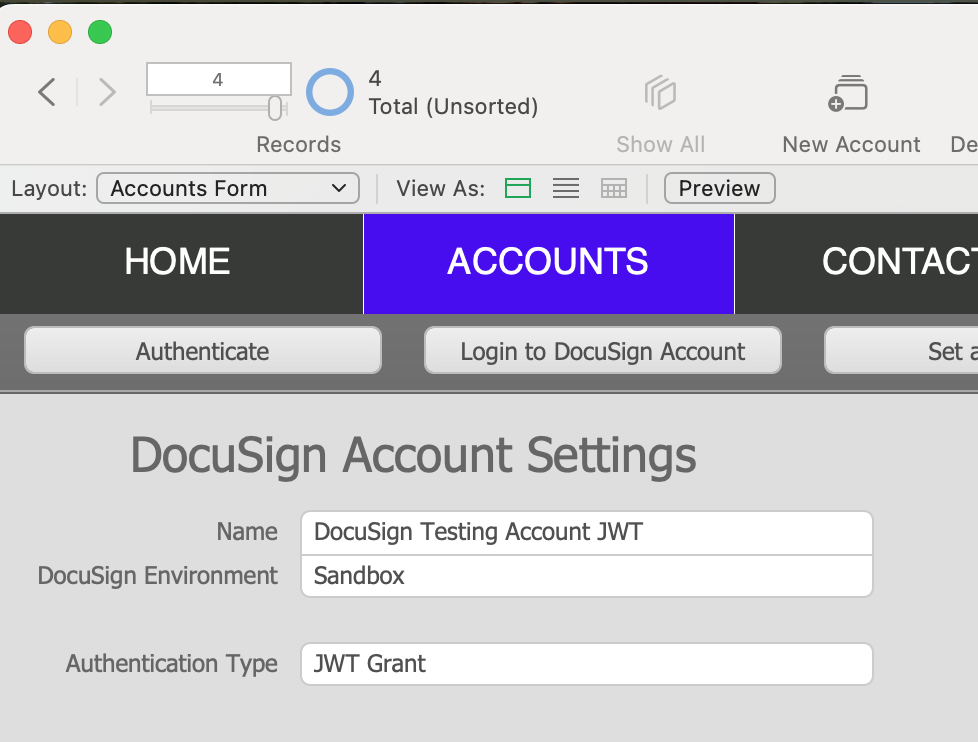
In the Accounts Form layout enter the Name for your reference, make sure the Docusign Environment is set to Sandbox and select JWT Grant from the Authentication Type menu:
After you have logged in to your Sandbox account select Admin from the navigation menu across the top:

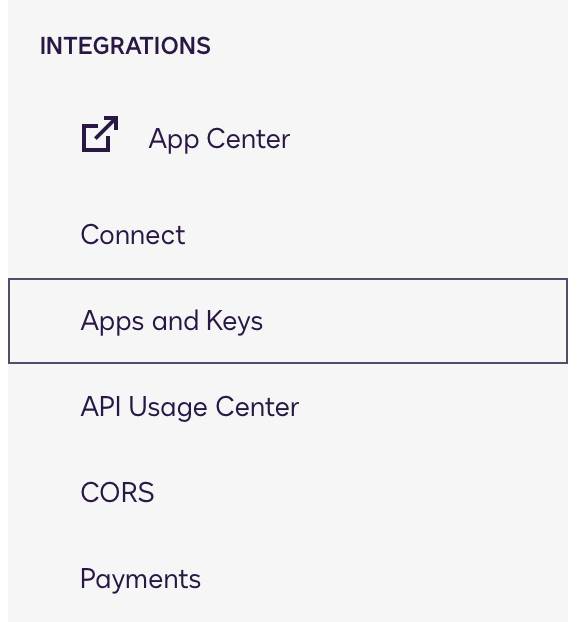
On the left side of the Admin screen select Apps and Keys to view your existing API apps and create a new set of API keys.
Under the My Account Information section click the button next to the User ID to copy the User ID to the clipboard and paste this into the API User ID field in the Accounts Form layout.
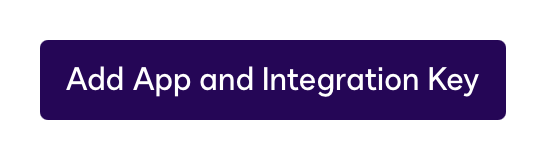
Click the Add App and Integration Key button to create a new Sandbox App:
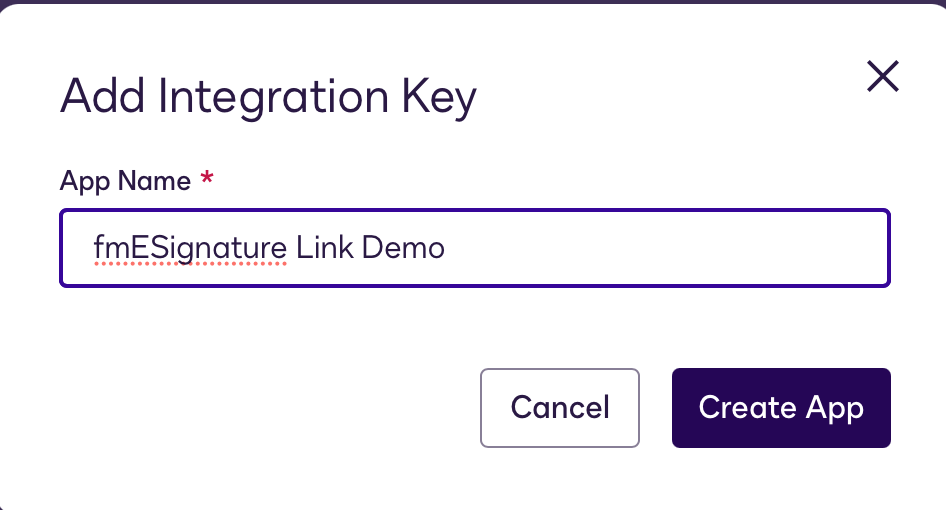
Give your App a Name and click the Create App button to proceed:
In the General Info section click the button next to the Integration Key to copy the Integration Key to the clipboard and paste this into the Integration Key field in the Accounts Form layout. For the Integration Type select the Private custom integration option.
In the Authentication section select Yes for the 'Is your application able to securely store a client secret' question.
Under Service Integration click the Generate RSA button to generate a Public and Private Key. Record these somewhere safe as they are only visible once upon creation. Copy and paste the Private Key into the Private Key field in the Account Settings.
Under Additional Settings click the ADD URI button to create a new Redirect URI. We recommend using the following URI:
https://docusign.com
which is also the default value that we set for the Redirect URL field in the fmESignature Link file. If you have changed this (e.g. to your own website) copy and paste the URI into the Redirect URL field in the Account Settings. N.B. the value in the Docusign App must also be exactly the same in the fmESignature Link file (you will get an error if these are not identical).
Click Save when you have finished.
The Account Settings in the fmESignature Link file should look like this:

You now need to then get consent to allow the fmESignature Link file to make API calls on behalf of your Docusign user account. To allow fmESignature Link to impersonate a user via API calls click the Copy Application Consent URL button at the top and paste this into your web browser which will take you to a page like this where you can grant consent:
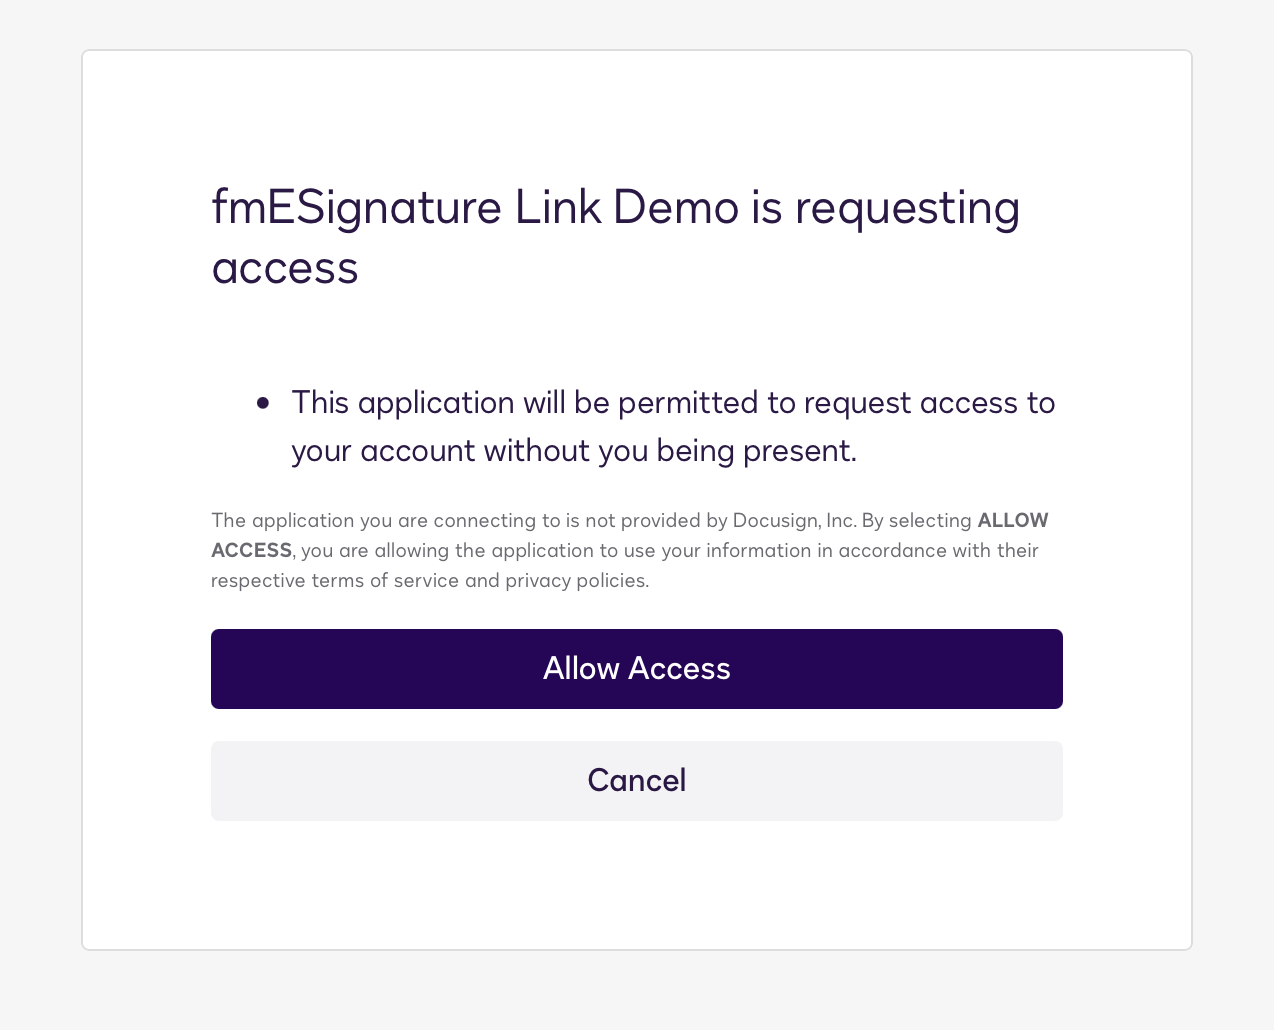
Click Allow Access when prompted to provide consent for the fmESignature Link file to create and send envelopes using the DocuSign API on your behalf. Once you have successfully authenticated with Docusign you will then be taken to the Redirect URI you entered for your Docusign App.
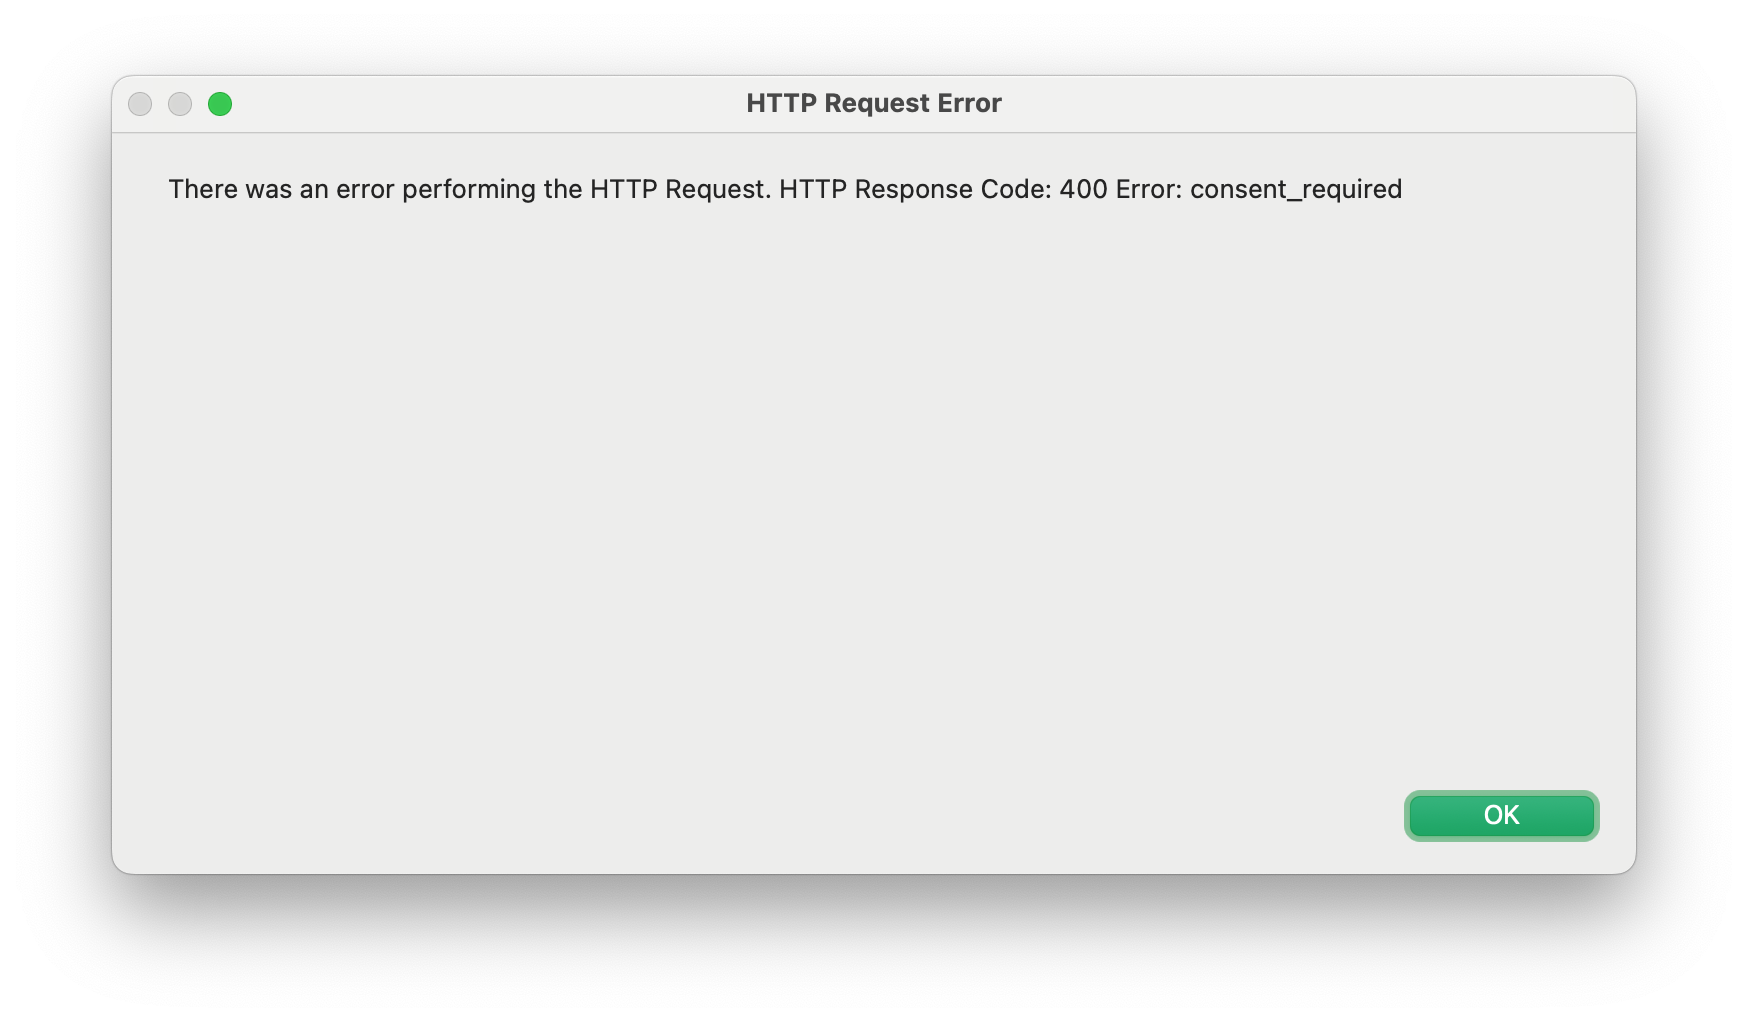
In the fmESignature Link Account Settings you can now click the Authenticate button in the top left hand corner which will attempt to authenticate with the Docusign API. If you have not first granted consent in a web browser you will get the following error:
If the Authentication is successful it will generate the following:
- Access Token
- Expires At (uses the FileMaker Server timestamp to handle users in multiple time zones)
- Base URI
- API Account ID
- Account Name
which are saved to their corresponding fields in the Account Settings:
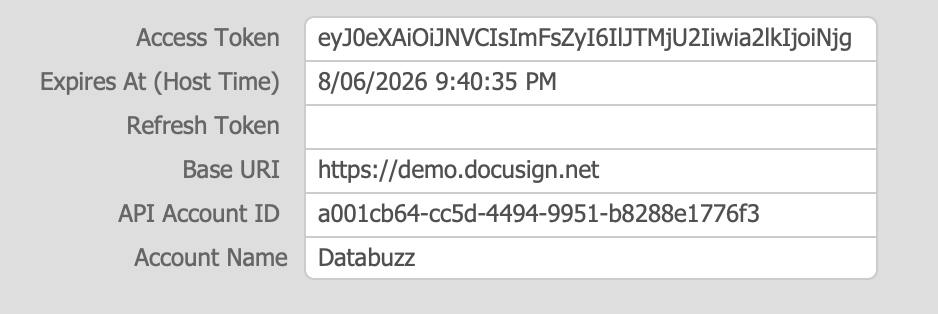
N.B. there will be no value for the Refresh Token field.
If your Docusign Sandbox user login has access to more than one Docusign Sandbox account you will also be presented with another window for you to select which Docusign account you wish to use:
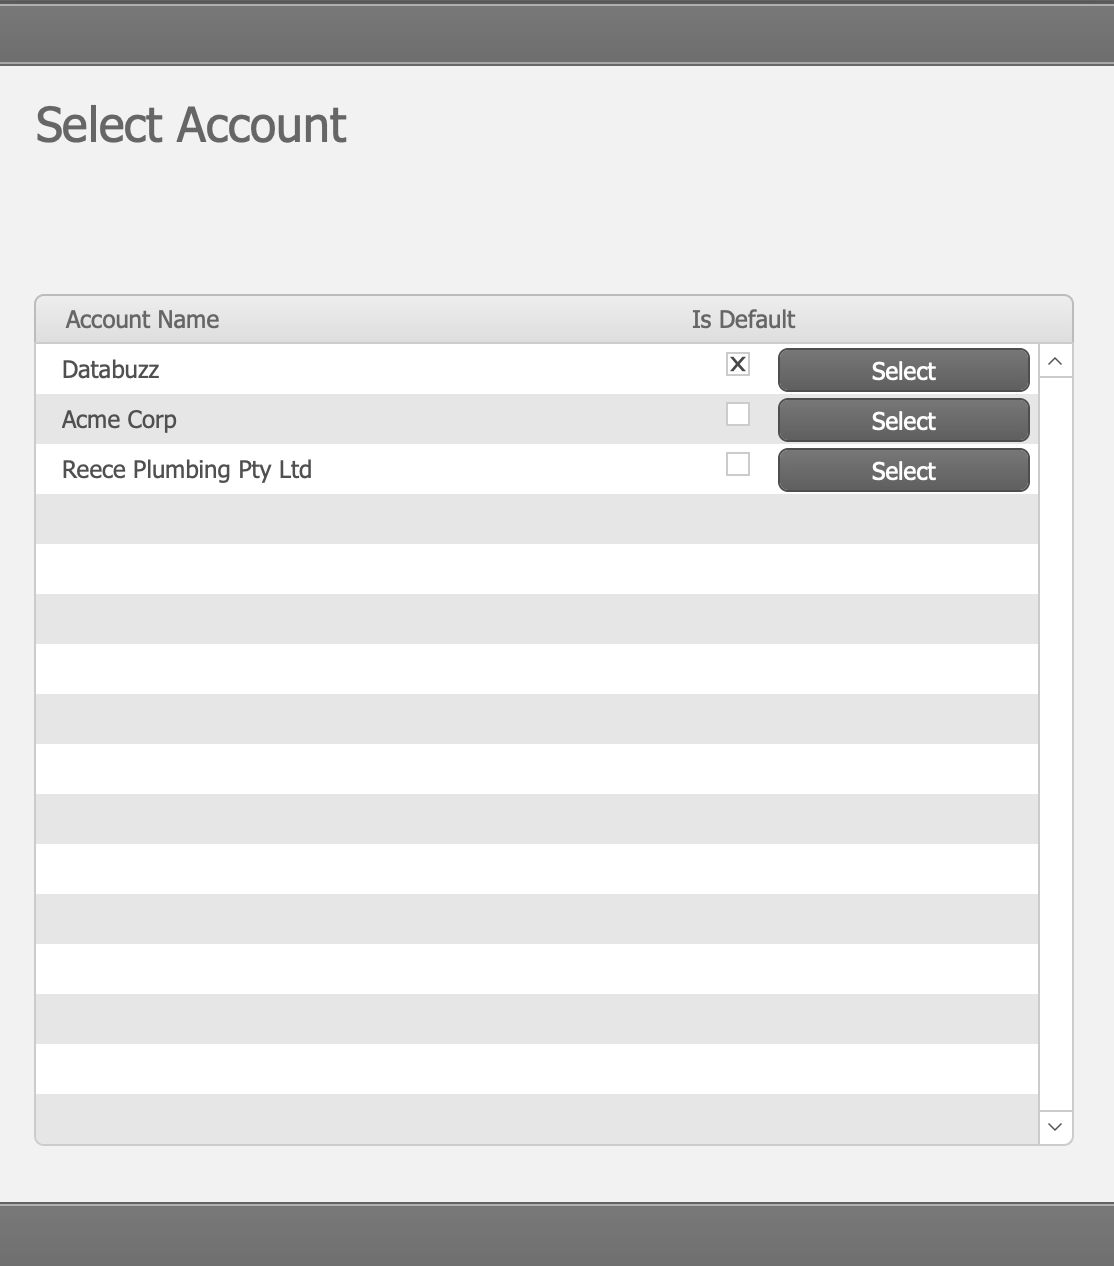
If you are presented with this just click the Select button to the right of the Docusign account you wish to use.
These will be used to authenticate with your Docusign app from now on. The access token granted by JWT Grant expires after one hour, and no refresh token is provided. After the token expires, you must generate a new JWT and exchange it for a new access token. fmESignature Link will automatically handle requesting a new access token when the existing one has expired.
We also recommend clicking the Set as Default button at the top of the screen to make this the default Account so you don't need to keep selecting the associated account when working with Templates and Requests.